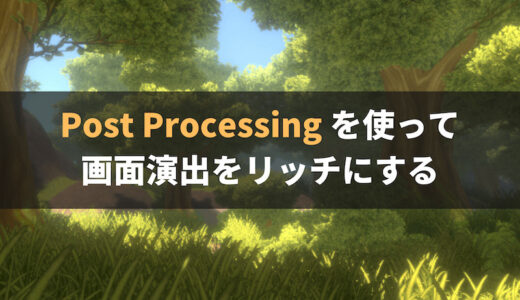

Unity の Post Processing の効果の 1 つにレンズの歪みを制御する「Lens Distortion」があります。
Lens Distortion を使うと、ドアスコープや魚眼レンズのように中央が拡大されて周辺部分は縮小し、丸みを帯びた見た目になります。
本記事では Lens Distortion の解説と、その効果を使って魚眼レンズ風のカメラ演出を作ってみます。
目次
バージョン情報
Unity 2019.4.20f1
Post Processing 3.0.3
Lens Distortion とは?
Lens Distortion とは Unity の Post Processing(ポストプロセス)で使える効果の 1 つで、カメラに適用することでレンズの歪みを制御できます。
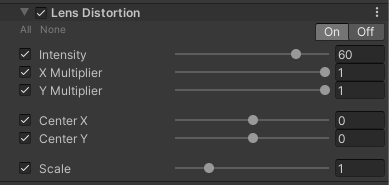
設定できるプロパティは 6 つあります。
| プロパティ | 説明 |
|---|---|
| Intensity | 歪み量の合計値を設定します。 |
| X Multiplier | X 軸に強度乗数を設定します。 この軸の歪みを無効にするには 0 を設定します。 |
| Y Multiplier | Y 軸に強度乗数を設定します。 この軸の歪みを無効にするには 0 を設定します。 |
| Center X | X 軸の歪みの中心点を設定します。 |
| Center Y | Y 軸の歪みの中心点を設定します。 |
| Scale | グローバル画面のスケーリングの値を設定します。 |
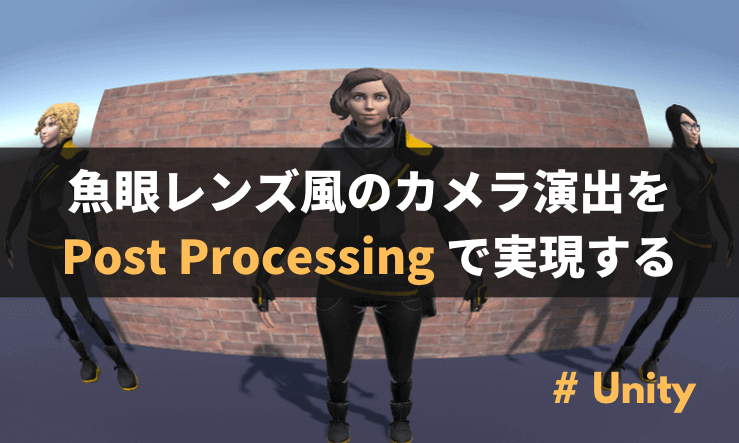
Lens Distortion で魚眼レンズ風のカメラ演出を作成
実際に Lens Distortion を使って魚眼レンズ風のカメラ演出を作っていきます。
オブジェクトを配置
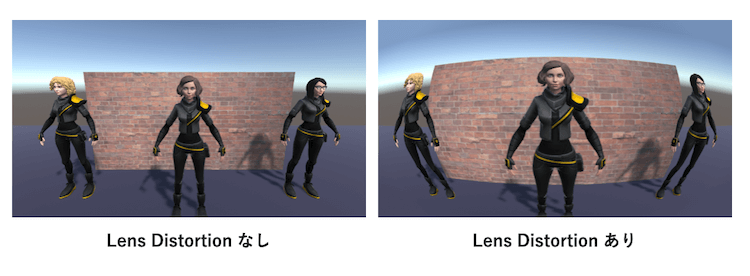
まずはカメラに映る対象となるオブジェクトを配置します。
オブジェクトを生成するなりアセットを使うなりで自由に配置してください。

上記画像に登場する人型の 3D モデルには「Human Characters (FREE Sample Pack)」という無料のアセットを使用しました。
Post Processing のインストール方法
既に Post Processing をインストール済の方はスキップして下さい。
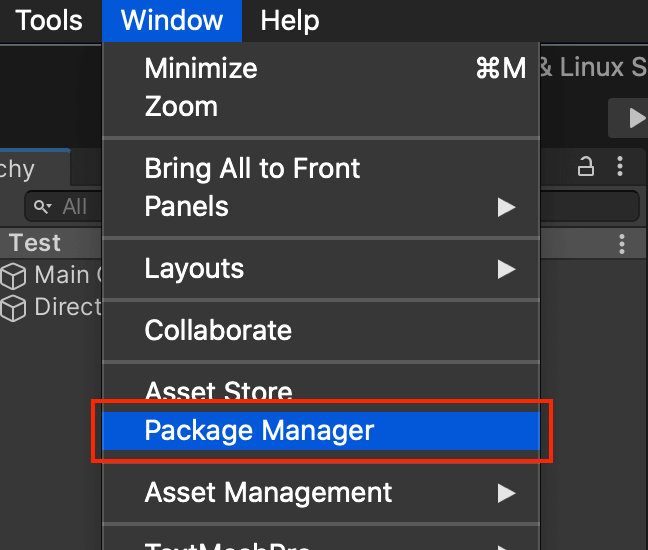
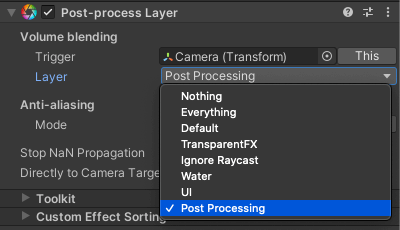
Unity の上部メニューから 「Window」->「Package Manager」を選択します。
「Post Processing」を検索して選択し、右下の「Install」からインストールを実行します。
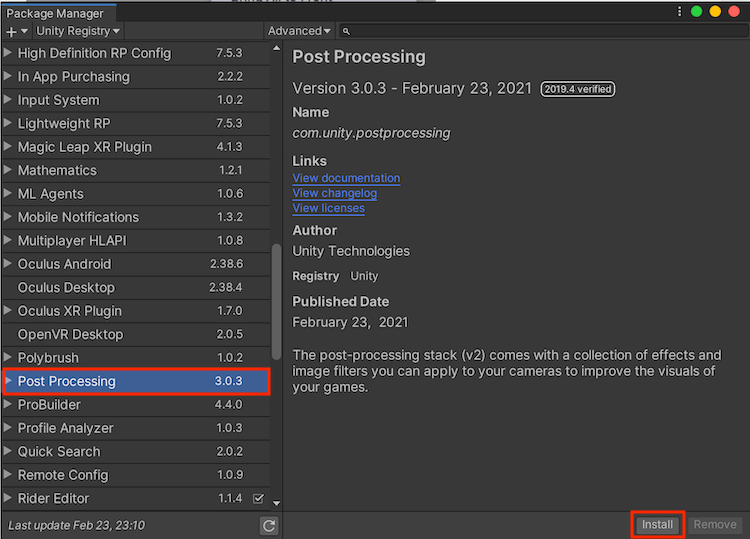
Post Processing の項目の右側にチェックマークが付けばインストール完了です。

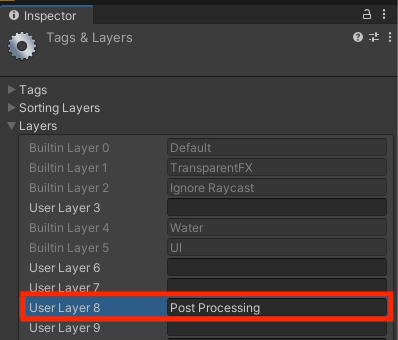
Post Process 用の Layer を追加
ポストプロセス用のレイヤーを追加します。
Inspector ウィンドウにて Layer を選択して「Add Layer…」からレイヤーを追加します。
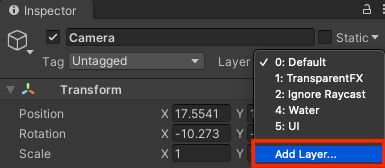
レイヤー名は好きな名前で大丈夫です。ここでは「Post Processing」と名付けました。
Post-Process Layer の設定
対象のカメラオブジェクトに「Post-Process Layer」コンポーネントを追加します。
カメラオブジェクトを選択し、 Inspector ウィンドウにて「Add Component」から「Post-process Layer」を選択します。
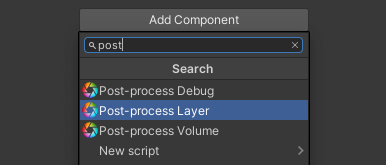
追加したコンポーネントの Layer を設定します。こちらに先程追加した「Post Processing」レイヤーを選んで設定します。
これでカメラの設定は完了です。
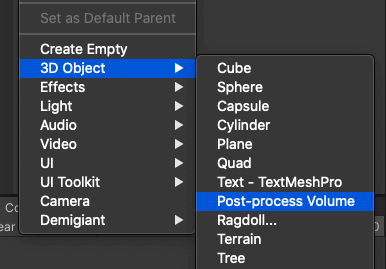
Post-Process Volume の設定
Hierarchy ウィンドウ上で右クリックし「3D Object」->「Post-Process Volume」 を選択し、「Post-Process Volume」オブジェクトを追加します。
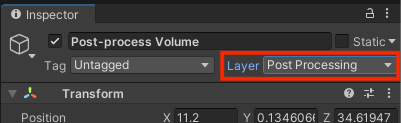
追加した「Post-Process Volume」の Inspector ウィンドウを確認して、Layer を「Post Processing」に変更します。
Post-Process Volume コンポーネントにて「IsGlobal」にチェックを入れます。
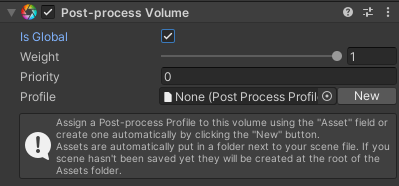
「Profile」プロパティの右側にある「New」ボタンを選択すると、新たに「Post-process Volume Profile」が生成されて、自動で「Profile」にセットされます。
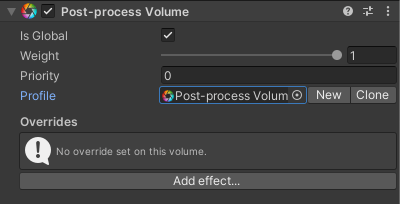
これで Post-Process Volume の設定は完了です。
Lens Distortion(レンズの歪み)の適用
先程追加した「Post-process Volume」を使い、レンズの歪みを制御するポストプロセスである「Lens Distortion」を適用します。
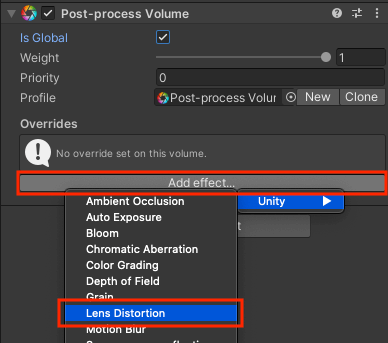
「Post-process Volume」コンポーネントの下部にある「Add effect…」ボタンを選択し「Unity」-> 「Lens Distortion」を選択します。
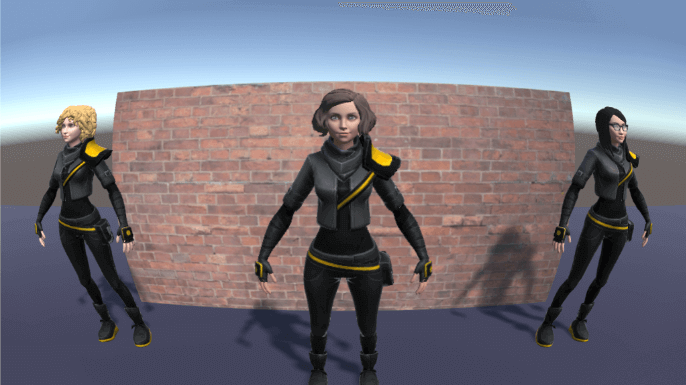
追加された「Lens Distortion」コンポーネントのプロパティはデフォルトでチェックボックスがオフになっています。使用するプロパティにチェックを入れて値を設定して下さい。
以下の画像では「Intensity」を 60 に設定しています。この値を変更することでレンズの歪み量を調整できます。
Lens Distortion を適用した結果が以下の画像です。
簡単な設定で魚眼レンズ風のカメラ演出が作成できました。
おわりに
ゲーム開発においては、今回の Lens Distortion を使うことでドアスコープを覗いた時の演出などに使えそうだなと感じました。
Post Processing でできる演出は他にも色々あるので、気になる方は他の演出も調べてみて下さい。
参考資料
- Post Processing Stack v2 overview | docs.unity3d.com
- Lens Distortion | docs.unity3d.com
関連記事